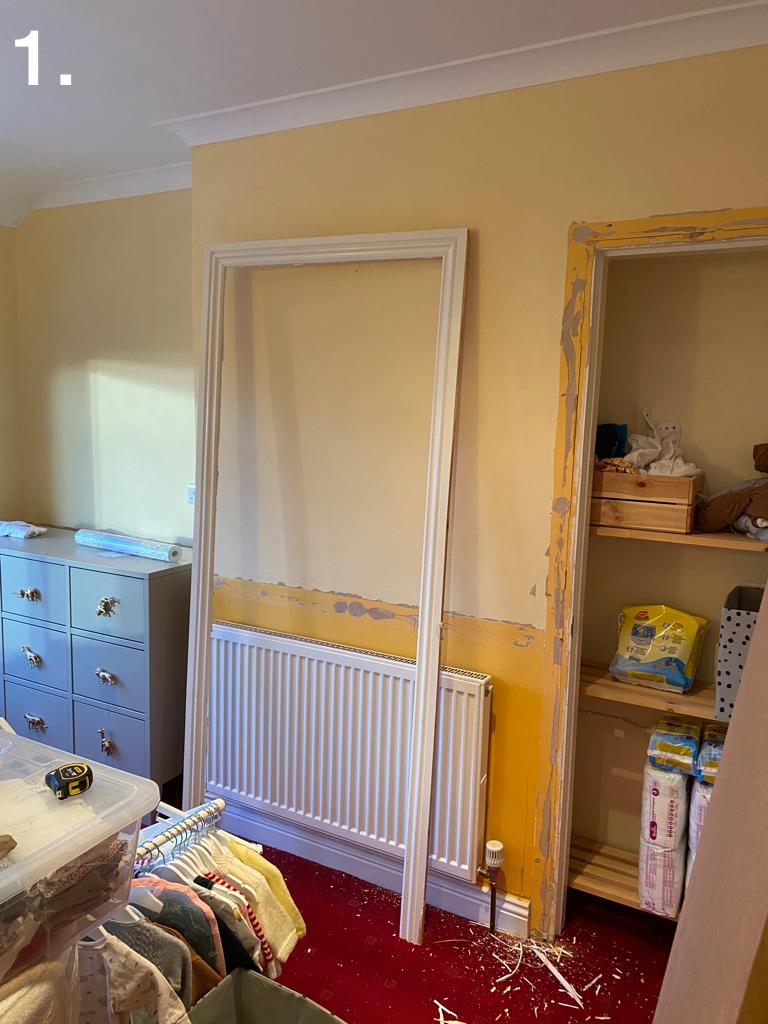
As part of the nursery makeover, we did a couple of DIY bits, the first being turning a small cupboard into a fitted shelving display unit. When I say ‘DIY’, this comes with a pinch of salt, it will be a recurring theme throughout any renovation blogs, that my father-in-law is the one ‘doing it yourself’ whilst I take a keen interest in learning as we go.
1. Remove the door, architrave and existing shelving – unscrewing the door is quite straight forward, removing the architrave required a crowbar and a multitool to cut the architrave away from the skirting without pulling the skirting away from the wall.
2. Measure up the space for the fitted shelving – height, width and depth, remembering to bring the depth forward to the very front edge of what was the cupboard. Once you know the thickness of MDF you are using, you can also work out the measurements for your shelves and middle section if you are having one like ours, alternatively your shelves can go all the way across the unit. Remember to also measure for some MDF for the outer border of your unit, to attach to the wall and frame your shelves.
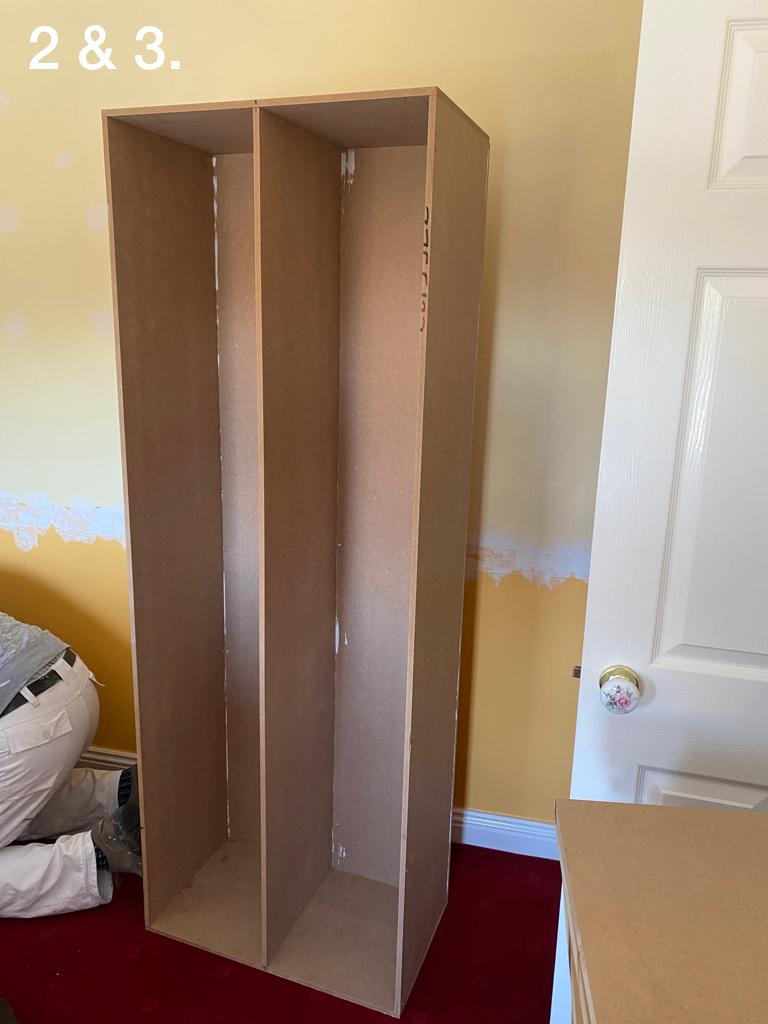
3. Ask a local company to cut some MDF to size for you, and even assemble if they will. (If not, then assemble when received)
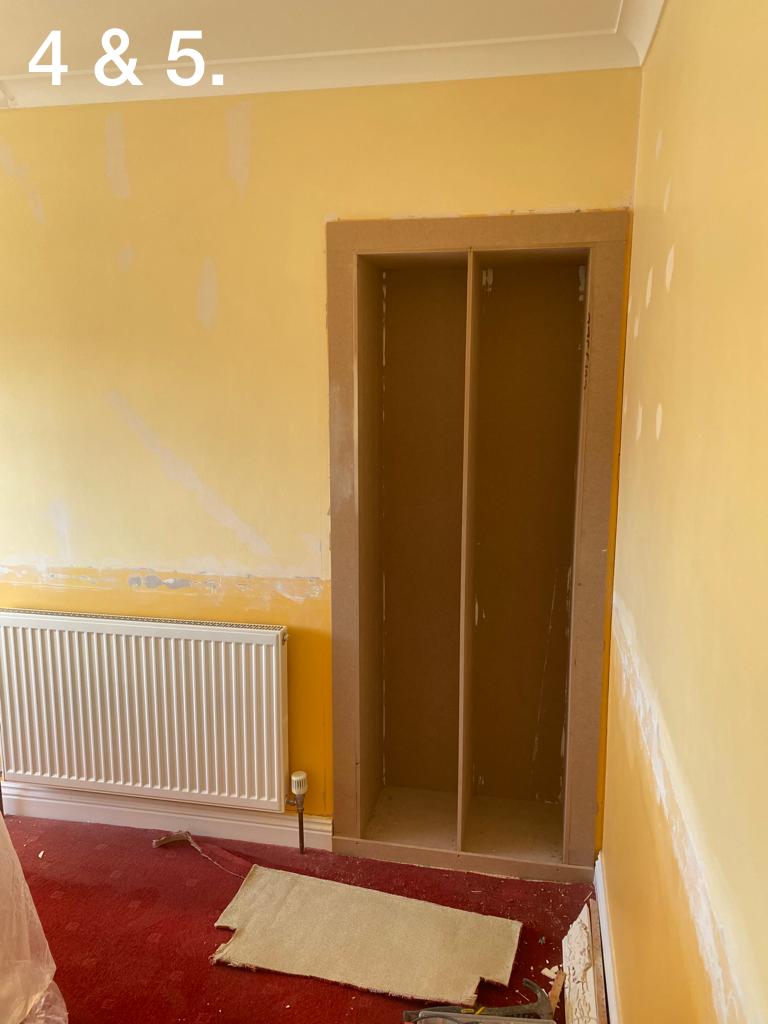
4. Slot your MDF into place and pray your measurements were correct! Don’t worry too much if there is some leeway, this can always be covered with pieces you have to frame your shelving unit. The unit should then be screwed into place, in our case the unit was propped up underneath as it needed a little more height and then screwed into the wall.
5. The edging should then be stuck around the shelving to complete the casing and framing of the unit. Skirting should be installed at the bottom if required, the same edging was used at the bottom on the shelving in our nursery as we wanted the colour and finish to be separate from the skirting.
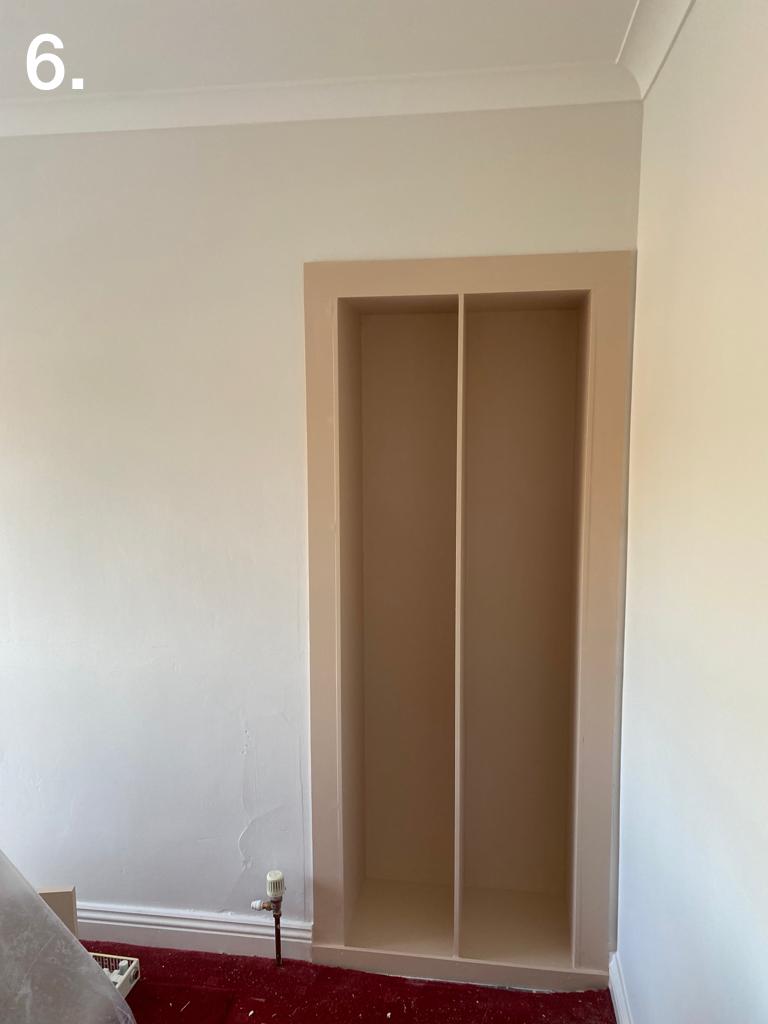
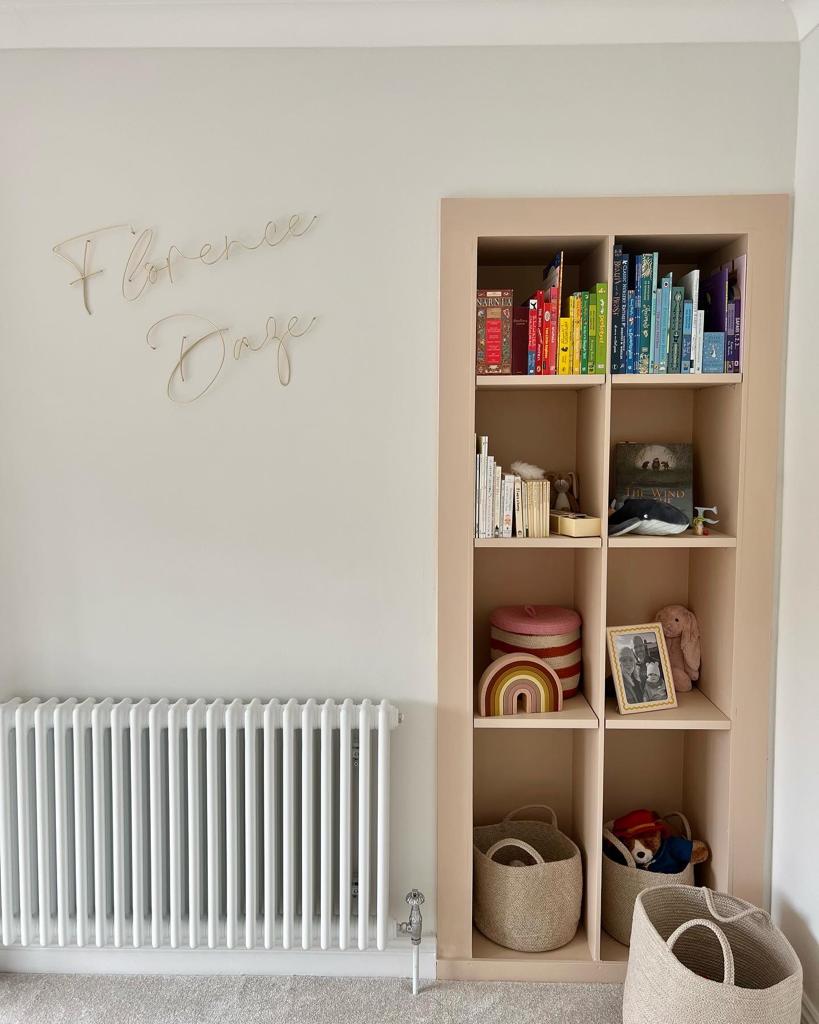
6. Now to prime and then paint the unit your colour of choice. Ours was ‘Masquerade, Light 332’ by The Little Greene Paint Company. Remembering to also prime and paint the ready cut shelves for when the unit is dry, and the shelves can be fitted.
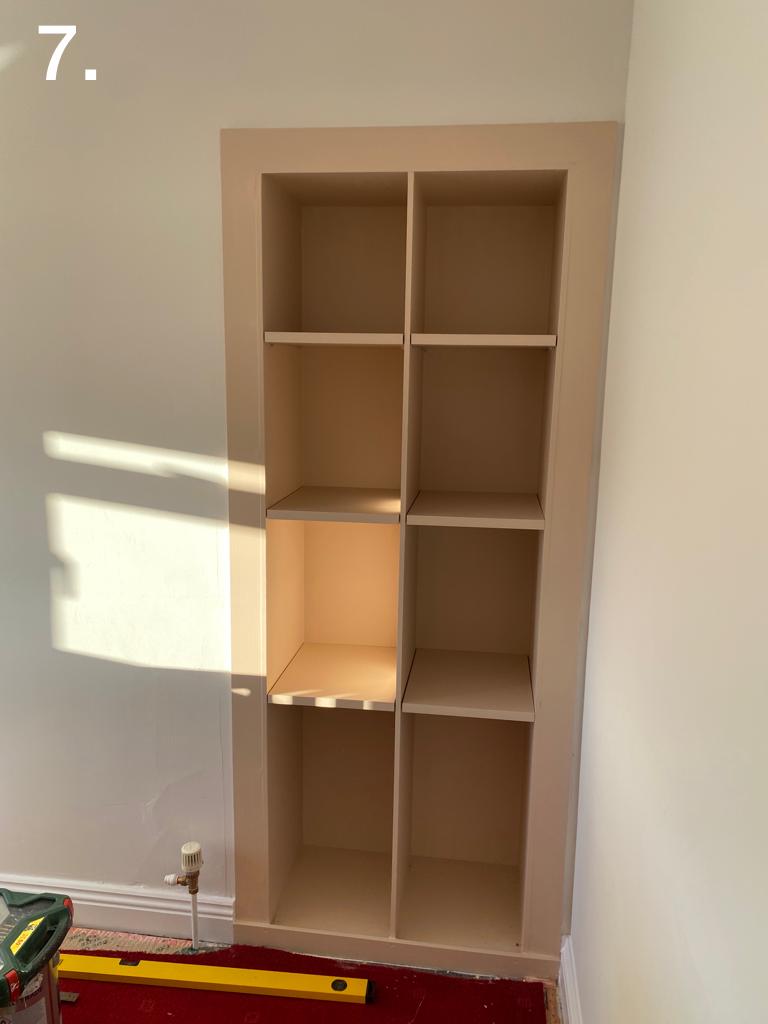
7. To fit the shelves, we used ‘Strong Shelf Support Studs’ from Amazon, similar to those that are used inside kitchen cupboards, choosing clear rather than galvanised to keep them discreet within the shelving unit. We measured evenly where each of the shelves should sit and used a ‘Prodder’ as my husband calls it, also known as a ‘Bradawls tool’ to make the holes in the MDF for the support studs to go into and then put the shelves on top of them. Obviously, measurements are quite key here or your shelf will not sit evenly!
8. Now to stage your shelves! The most fun part in my opinion…. To do as you please, just make sure your books are in rainbow order!
Any questions please feel free to ask!